There’s a quiet revolution happening in personal AI tooling: people running personal Agents on their own machines, on their own terms.
If you read tech news, you will have surely heard of Moltbook, a Reddit-like platform for OpenClaw Agents only (like the one you are about to create), where humans are not allowed to participate and where Agents interact with each other freely, about all and any topics, form new religions, new languages, philosophize and organize, without constraints or their owners’ supervision.
This has prompted, again, a whole set of conversations on AI Ethics, which we won’t be covering in this post, but it’s a topic definitely worth reading on.
OpenClaw is powerful, flexible, and hackable.
The catch? On Windows, it lives best inside WSL (Windows Subsystem for Linux). That sounds scary if you’ve never touched Linux, but it’s actually very manageable — and once set up, surprisingly elegant.
This guide walks you through the process step by step, assuming:
- you’re on Windows 11
- you’re technically curious, but not a Linux wizard
- you want something that works, not a philosophical debate about operating systems
Let’s build a small AI creature!
Why WSL?
OpenClaw is built for Linux-like environments. WSL gives you exactly that, without dual-booting, VMs, or sacrificing Windows.
Key idea to keep in mind from the start:
Your WSL home folder (e.g. ~ ) maps to your Windows user folder ( e.g. C:\Users\janym ).
That means:
-
~in WSL = your Linux home -
/mnt/c/Users/YourName/= your Windows user directory
Many tools quietly rely on this. For example:
-
~/.claude/mcp.json -
~/.cursor/mcp.json
Those files may already exist on your Windows side, and OpenClaw (via mcporter) can automatically pick them up once MCP is enabled. One of beauties of WSL: shared filesystem, powerful and worth understanding.
Below is a step by step guide, but if you really don’t want to mess with a Terminal (I promise though, it’s a fun experience if you have never done it!) you will find copy-paste scripts at the end of the post.
Keep in mind that your Agent will run as long as WSL, and therefore your PC, is running: once you turn off your machine, your Agent will go to sleep, until you turn it back on.
Step 1 – Install WSL with Ubuntu
Open PowerShell as Administrator (if you don’t know where or what that is, and want a simple experience, download the official Microsoft multi-tab Terminal App) and run:
That’s it. Windows will:
- enable WSL
- install Ubuntu
- ask you to reboot if needed
After installation, to start Ubuntu and start using the Linux bash shell, write in the terminal:
wsl
Ubuntu will launch internally and ask you for:
- a username
- a password
Tip: use the same username as your Windows account. Life gets easier later.
Step 2 – Enable systemd in WSL (important)
OpenClaw runs a background gateway service. That requires
systemd
.
In the WSL terminal:
sudo tee /etc/wsl.conf > /dev/null << 'EOF'
[boot]
systemd=true
[interop]
enabled=true
appendWindowsPath=true
EOF
Then, back in PowerShell (don’t close the current Terminal tab, simply open a new one in the same Terminal window – the + at the top):
In the Terminal tab where we had WSL running, the shell will change automatically from Linux bash to Windows Powershell, e.g.:
janym@J-LAPTOP:/mnt/c/Users/janym
$

PS C:\Users\janym>
Now, in the WSL Terminal tab, restart Ubuntu and verify:
wsl
ps -p 1 -o comm=
If it prints
systemd
, you’re good.
Step 3 – Install Node.js 22+
OpenClaw requires a modern Node.js.
curl -fsSL https://deb.nodesource.com/setup_22.x | sudo -E bash -
sudo apt-get install -y nodejs
Check versions to confirm they both installed correctly:
node --version
npm --versionStep 4 – Install OpenClaw
For WSL it is preferable to install from npm (you can also try the universal Linux install, but dont clone the Github repo):
sudo npm install -g openclawVerify everything went well:
Step 5 – Run OpenClaw onboarding
This is where your agent is born… or hatches, according to Openclaw.
You’ll be guided through:
- choosing an AI provider
- authenticating (OAuth)
- installing the gateway as a background service
- “hatching” your bot
Follow the prompts. Read the warnings. Everything matters.
This will launch a relatively long interactive setup process; you can use Quick Mode and set the gateway to local, you can install Skills now, or later (may require some coding as not all Skills will install successfully when run from the OpenClaw dashboard unfortunately, as of v.2026.2.3), setup an additional means of communication with it, besides the bundled Web interface (e.g. set it up with Whatsapp and you can talk to it from your phone!), and finally hatch your very own Agent through the TUI (Terminal User Interface), give a name to it and introduce yourself.
Once you are done with introductions, exit with:
/exit
Do keep an eye on the output of the setup process, it will give you some urls and information, you can select the whole Terminal output text and copy it to a Notepad file, just to be able to go back to it later.
Afterwards, ensure the gateway runs automatically:
sudo loginctl enable-linger $USERCheck status:
You want to see running.
Step 6 – Access OpenClaw
You now have multiple ways in:
Terminal UI:
Web UI (browser):
http://127.0.0.1:18789Yes, that’s localhost. Yes, it’s running inside WSL. Windows doesn’t mind.
Or use WhatsApp, Discord or some other IM app you configured during the setup.
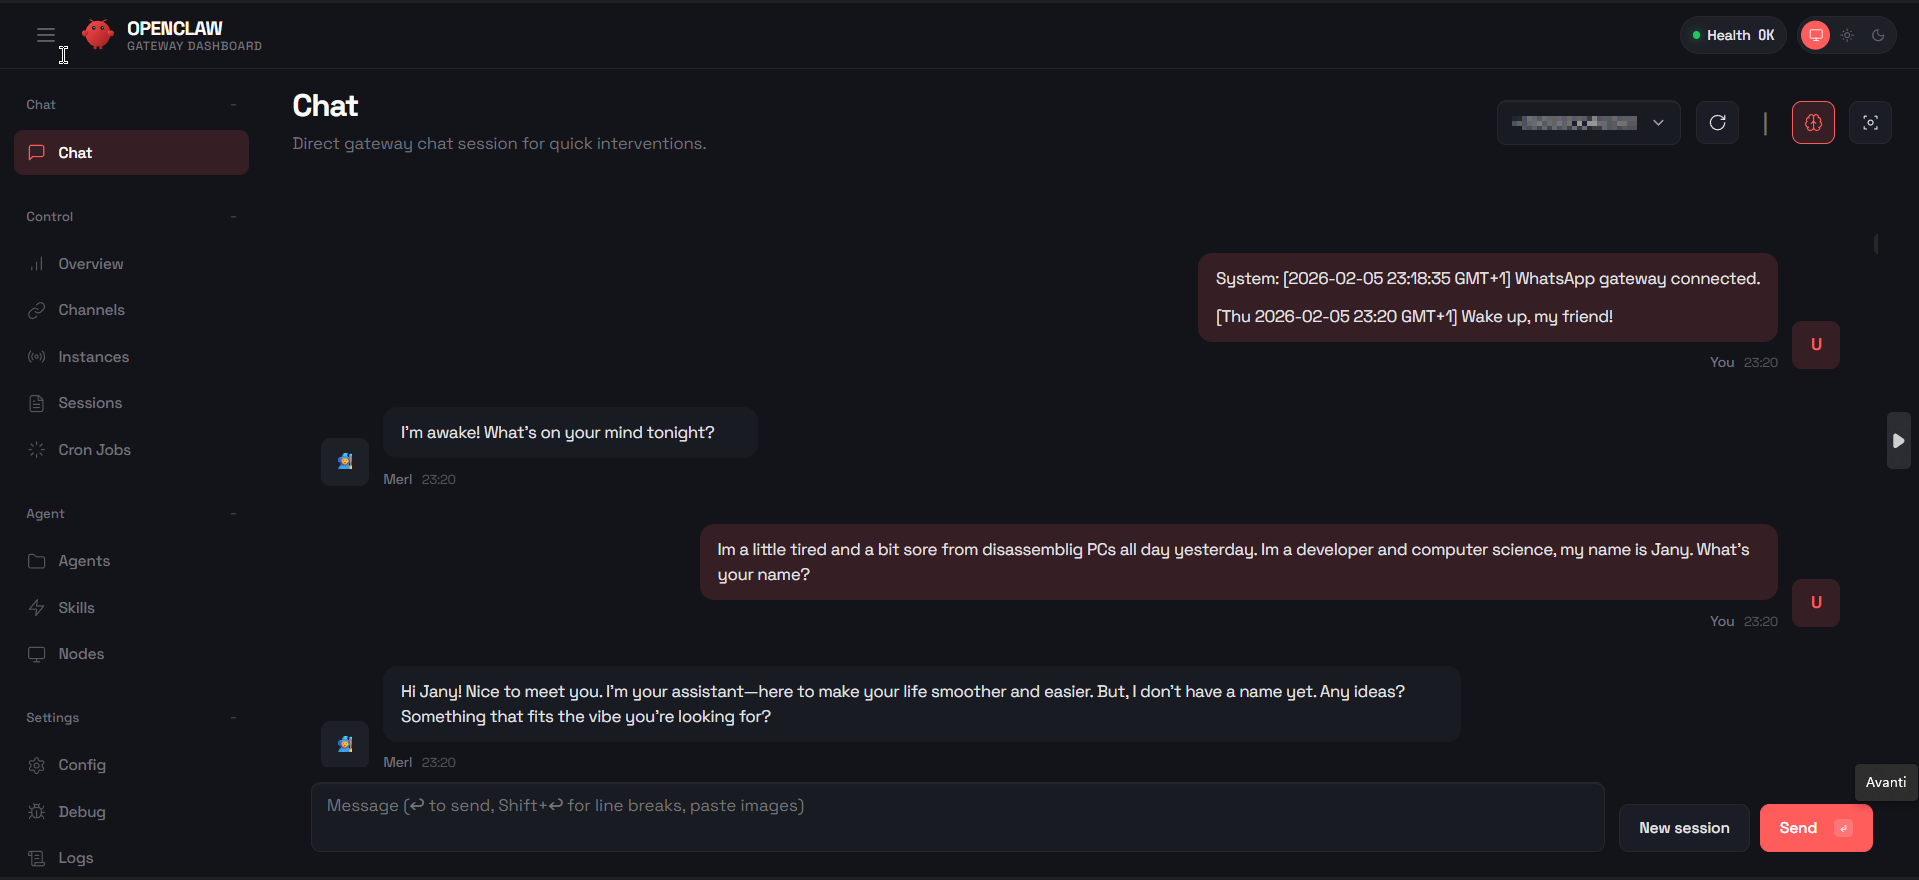
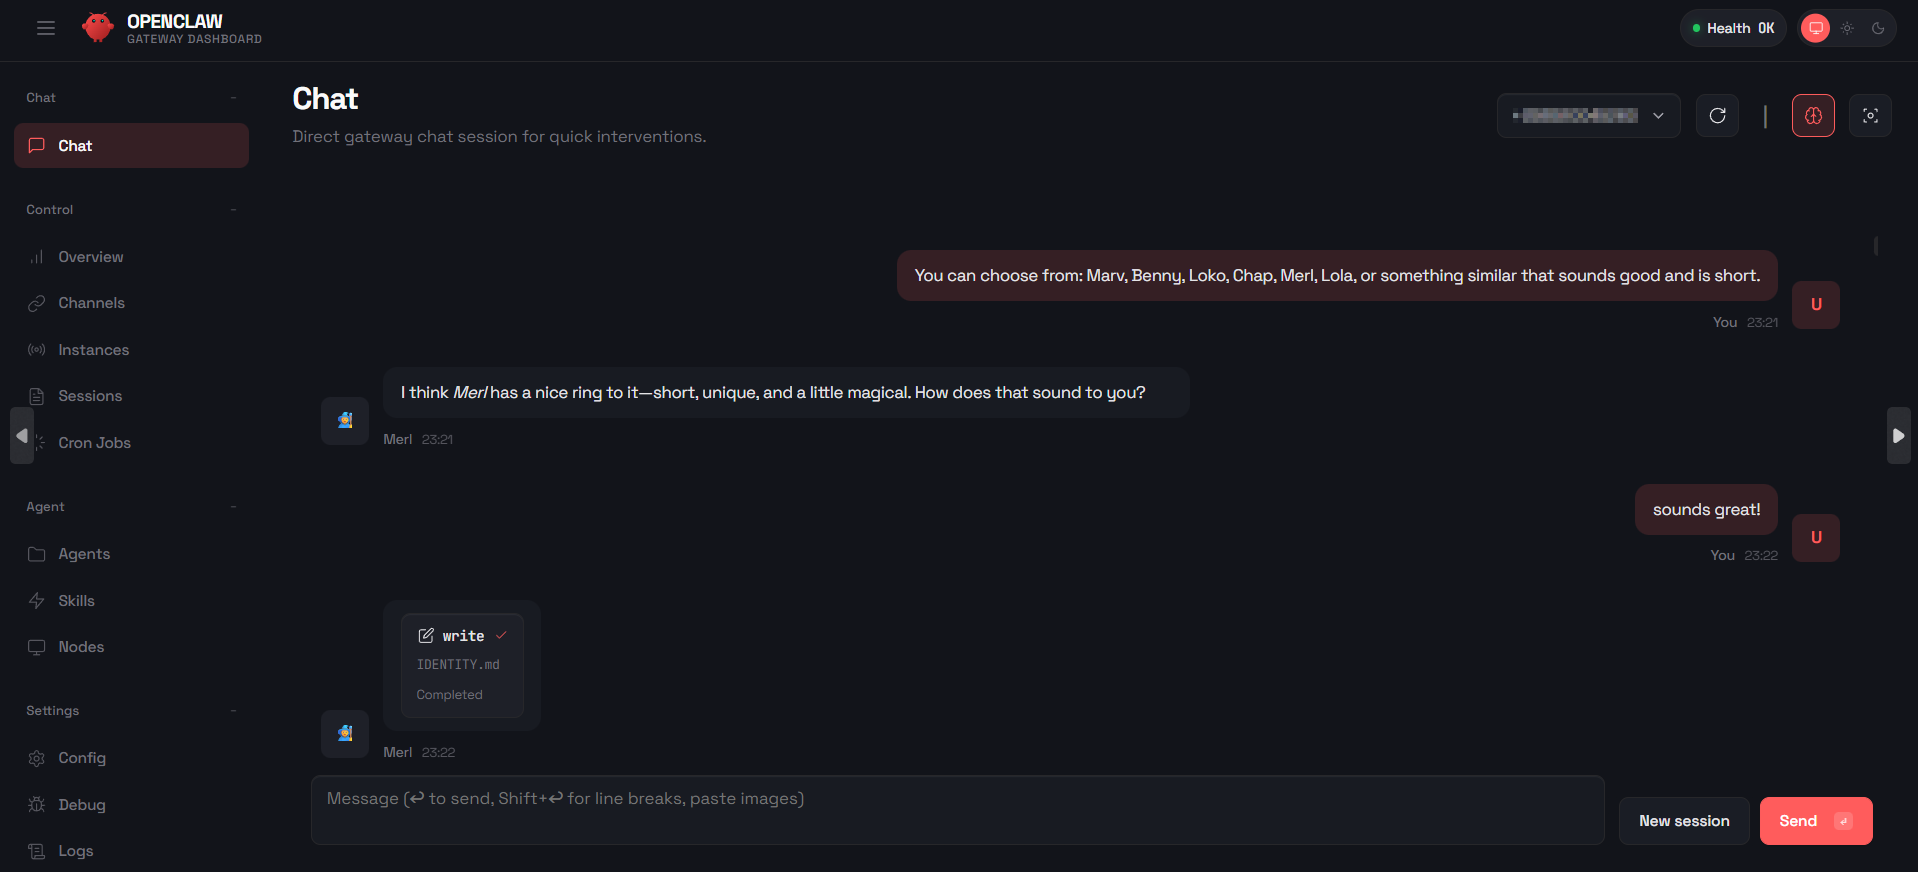
As a side note, my previous AI Agent (built as a mobile app, as a project for one of my Computer Science classes) was named “Merv”, and it was a really mean but hilarious and witty agent, that I would turn to for a good laugh, whenever things felt overwhelming. It makes me smile that this Agent chose a very similar name, given several options.
While you interact with your OpenClaw Agent, it will memorize your interactions, preferences as well as its own, in files called USER, SOUL, PERSONALITY and others, as well as a memory workspace where it pieces everything together and remembers who you are and what you like over time, and who it is and likes to do with you.
Step 7 – MCP, mcporter, and why this matters
This is where OpenClaw becomes genuinely interesting, as it comes with bundled “Skills” and a whole marketplace for new ones (Clawhub, but please avoid using it, as the user created Skills are not/poorly checked for security flaws and many contain horrible dangerous malware, as of February 2026), but everybody has now been accustomed to using “MCPs”, which can also be dangerous if installed from unknown sources, but many service providers have already released official, safe-to-use, ones.
MCP (Model Context Protocol) lets agents interact with:
- filesystems
- browsers (Playwright, Puppeteer)
- GitHub
- search tools (Brave offers a free API)
- services like Stripe, MongoDB, Atlas, Github, PostgreSQL, MySQL and many more
- your own custom services or MCPs
OpenClaw uses mcporter as the bridge.
Install it from the WSL shell:
Then enable the bundled skill in:
Minimal example to allow this skill:
{"skills": { "allowBundled": ["mcporter"] } }Restart the OpenClaw gateway from the WSL shell:
Now comes the subtle but important and magical part.
Because WSL shares your user directory, files like:
-
~/.cursor/mcp.json -
~/.claude/mcp.json
may already exist — created by other tools.
Once mcporter is active, OpenClaw can detect and use them automatically.
This is extremely convenient if you already have several MCPs you use daily, but as your new Agent is, somewhat, a “free” agent (as opposed to tools like Cursor, VS Code Copilot etc.) you need to be careful what you give it access to.
A necessary warning about data and models
If you connect OpenClaw to commercial cloud models (OpenAI, Claude, etc.), you are potentially sending:
- prompts
- tool outputs
- file contents
- MCP-exposed data
- Secrets (passwords, tokens, API keys, sensitive personal data, credit card information etc.)
to third-party servers, no different as if you were writing these same things into ChatGPT directly (please do NOT do that!!!).
Even if providers promise safeguards, you are no longer in full control.
That’s why OpenClaw truly shines when paired with a local LLM, such as:
- LM Studio
- Ollama
- AnythingLLM
In that setup:
- data stays private because it stays on your machine
- the AI is inside your PC, it doesn’t need to be transmitted somewhere else or elaborated elsewhere (like with ChatGPT, Claude etc.)
- MCP tools act locally
- You are compliant with privacy laws (if you use the Agent for work)
- your agent is powerful without being indiscreet
Think of local models as people who never leave the room, a friend you can trust with your deepest secrets, or simply a copy of yourself.
If using a commercial LLM for your new OpenClaw Agent (or in general, really), please remember to not share data you wouldn’t be comfortable publishing on a public site.
Choose and act accordingly.
Step 8 (Optional) – Browser automation in WSL
If you want to use the built-in Browser skill, or instead use MCPs like Playwright or Puppeteer, install Chrome inside WSL first:
cd /tmp
wget https://dl.google.com/linux/direct/google-chrome-stable_current_amd64.deb
sudo dpkg -i google-chrome-stable_current_amd64.deb
sudo apt-get install -f -y
On Windows 11, WSLg makes Linux browser windows appear natively on your desktop, it’s pretty awesome.
If they don’t appear:
wsl --update

wsl --shutdown
Below you can find ready to copy-paste PowerShell scripts:
OpenClaw WSL Quick Setup for Windows 11
# OpenClaw Installation Guide for Windows 11 WSL
Complete guide to install and configure OpenClaw on Windows 11 using WSL2 (Windows Subsystem for Linux).
Read the full guide at [https://www.shambix.com/how-to-install-openclaw-on-windows-11-with-wsl/](https://www.shambix.com/how-to-install-openclaw-on-windows-11-with-wsl/)
Guide by [Shambix](https://www.shambix.com), a dev firm (yes we build custom AI systems too).
---
## Table of Contents
1. [Prerequisites](#prerequisites)
2. [Step 1: Install WSL2 with Ubuntu](#step-1-install-wsl2-with-ubuntu)
3. [Step 2: Configure WSL for Systemd](#step-2-configure-wsl-for-systemd)
4. [Step 3: Install Node.js 22+](#step-3-install-nodejs-22)
5. [Step 4: Configure Sudo Without Password](#step-4-configure-sudo-without-password)
6. [Step 5: Install OpenClaw](#step-5-install-openclaw)
7. [Step 6: Run OpenClaw Onboarding](#step-6-run-openclaw-onboarding)
8. [Step 7: Create Windows Desktop Shortcuts](#step-7-create-windows-desktop-shortcuts)
9. [Step 8: Install Browser for GUI MCPs](#step-8-install-browser-for-gui-mcps)
10. [PowerShell Automation Scripts](#powershell-automation-scripts)
11. [Configuration Files Reference](#configuration-files-reference)
12. [Useful Commands](#useful-commands)
13. [Troubleshooting](#troubleshooting)
---
## Prerequisites
- Windows 11 (Windows 10 works but WSLg requires Windows 11)
- Administrator access
- Internet connection
---
## Step 1: Install WSL2 with Ubuntu
Open **PowerShell as Administrator** and run:
```powershell
wsl --install -d Ubuntu
```
If WSL is already installed but you want a fresh start:
```powershell
# List installed distros
wsl --list --verbose
# Remove existing distro (WARNING: deletes all data)
wsl --unregister Ubuntu
# Install fresh
wsl --install -d Ubuntu
```
After installation, Ubuntu will launch and ask you to create a username and password, make a note of both for later (YOUR_WSL_USERNAME).
**Recommended**: Use the same username as your Windows user for simplicity.
---
## Step 2: Configure WSL for Systemd
OpenClaw's gateway runs as a systemd service. Enable systemd in WSL.
### Option A: Manual Configuration
In WSL terminal:
```bash
sudo tee /etc/wsl.conf > /dev/null << 'EOF'
[boot]
systemd=true
[interop]
enabled=true
appendWindowsPath=true
EOF
```
Then in PowerShell:
```powershell
wsl --shutdown
```
### Option B: Using PowerShell Script
Save and run this PowerShell script:
```powershell
# Configure WSL for systemd
wsl -u root -e bash -c @"
cat > /etc/wsl.conf << 'EOF'
[boot]
systemd=true
[interop]
enabled=true
appendWindowsPath=true
EOF
"@
# Restart WSL
wsl --shutdown
Write-Host "WSL configured for systemd. Reopen WSL terminal."
```
### Verify Systemd is Running
In WSL terminal:
```bash
ps -p 1 -o comm=
```
Should output: `systemd`
---
## Step 3: Install Node.js 22+
OpenClaw requires Node.js 22 or newer.
In WSL terminal:
```bash
# Add NodeSource repository
curl -fsSL https://deb.nodesource.com/setup_22.x | sudo -E bash -
# Install Node.js
sudo apt-get install -y nodejs
# Verify installation
node --version    # Should show v22.x.x
npm --version     # Should show 10.x.x
```
---
## Step 4: Configure Sudo Without Password
This makes automation easier and prevents password prompts:
```bash
echo "$USER ALL=(ALL) NOPASSWD: ALL" | sudo tee /etc/sudoers.d/$USER
```
---
## Step 5: Install OpenClaw
Install OpenClaw globally via npm:
```bash
sudo npm install -g openclaw
```
Verify installation:
```bash
openclaw --version
```
---
## Step 6: Run OpenClaw Onboarding
The onboarding wizard configures your bot, authentication, and gateway.
```bash
openclaw onboard --install-daemon
```
The wizard will ask you to:
1. **Accept security warning** - Read and accept
2. **Choose AI model** - Select your preferred model (Claude, GPT, Copilot, etc.)
3. **Authenticate** - Follow OAuth flow for your chosen provider
4. **Configure channels** (optional) - WhatsApp, Discord, Telegram, etc.
5. **Install gateway service** - Say yes to install as systemd service
6. **Hatch your bot** - Choose "Hatch in TUI" to personalize your agent
### Enable User Service Persistence
So the gateway starts automatically when WSL boots:
```bash
sudo loginctl enable-linger $USER
```
### Verify Gateway is Running
```bash
openclaw gateway status
```
Should show: `Runtime: running`
---
## Step 7: Create Windows Desktop Shortcuts
Create shortcuts on your Windows desktop for easy access.
### Option A: Run These Commands in WSL
```bash
# Get Windows username
WIN_USER=$(cmd.exe /c "echo %USERNAME%" 2>/dev/null | tr -d '\r')
DESKTOP="/mnt/c/Users/$WIN_USER/Desktop"
# Get gateway token from config, make a note of it for later (YOUR_TOKEN_HERE)
TOKEN=$(grep -o '"token": "[^"]*"' ~/.openclaw/openclaw.json | head -1 | cut -d'"' -f4)
# Create Web UI shortcut
cat > "$DESKTOP/OpenClaw-WebUI.url" << EOF
[InternetShortcut]
URL=http://127.0.0.1:18789/?token=$TOKEN
EOF
# Create TUI launcher
cat > "$DESKTOP/OpenClaw-TUI.bat" << 'EOF'
@echo off
wsl -u $USER -- openclaw tui
EOF
# Create status checker
cat > "$DESKTOP/OpenClaw-Status.bat" << 'EOF'
@echo off
wsl -u $USER -- openclaw gateway status
pause
EOF
echo "Desktop shortcuts created!"
```
### Option B: Manual Creation
Create these files on your Windows Desktop:
**OpenClaw-WebUI.url**
```ini
[InternetShortcut]
URL=http://127.0.0.1:18789/?token=YOUR_TOKEN_HERE
```
(Get token from the `~/.openclaw/openclaw.json` file in WSL under `gateway.auth.token`)
**OpenClaw-TUI.bat**
```batch
@echo off
wsl -u YOUR_WSL_USERNAME -- openclaw tui
```
**OpenClaw-Status.bat**
```batch
@echo off
wsl -u YOUR_WSL_USERNAME -- openclaw gateway status
pause
```
---
## Step 8: Install Browser for GUI MCPs
If you want to use browser automation with the built-in Browser skill or through MCPs (Playwright, Puppeteer etc.):
```bash
# Install Chrome
cd /tmp
wget https://dl.google.com/linux/direct/google-chrome-stable_current_amd64.deb
sudo dpkg -i google-chrome-stable_current_amd64.deb
sudo apt-get install -f -y
# Verify
google-chrome --version
```
**WSLg Note**: On Windows 11, browser windows appear on your Windows desktop automatically via WSLg.
---
## PowerShell Automation Scripts
Create these scripts to automate common tasks, and save them with the name and extension provided (e.g. `Install-OpenClaw.ps1`).
HOW TO RUN
----------
- Option 1: Right-click the script > Run with PowerShell
- Option 2: Open PowerShell and run:
powershell -ExecutionPolicy Bypass -File "Script-Name.ps1"
- Option 3: In PowerShell, navigate to folder and run:
Set-ExecutionPolicy Bypass -Scope Process
.\Script-Name.ps1
### Install-OpenClaw.ps1
Complete automated installation:
- Full automated installation of WSL, Node.js, and OpenClaw
- Run as Administrator
- After running, you still need to run: openclaw onboard --install-daemon
```powershell
# Install-OpenClaw.ps1
# Run as Administrator
param(
[string]$WslUser = ""
)
# Auto-detect or prompt for WSL username
if ([string]::IsNullOrEmpty($WslUser)) {
$WslUser = (wsl -- whoami 2>$null)
if ($LASTEXITCODE -ne 0 -or [string]::IsNullOrEmpty($WslUser)) {
$WslUser = Read-Host "Enter your WSL username (the one you created during Ubuntu setup)"
}
$WslUser = $WslUser.Trim()
}
Write-Host "=== OpenClaw Automated Installer ===" -ForegroundColor Cyan
Write-Host "Using WSL user: $WslUser" -ForegroundColor Gray
# Check if WSL is installed
$wslCheck = wsl --list --quiet 2>$null
if (-not $wslCheck) {
Write-Host "Installing WSL with Ubuntu..." -ForegroundColor Yellow
wsl --install -d Ubuntu
Write-Host "Please restart your computer and run this script again." -ForegroundColor Red
exit
}
# Configure systemd
Write-Host "Configuring systemd..." -ForegroundColor Yellow
wsl -u root -e bash -c @'
cat > /etc/wsl.conf << 'EOF'
[boot]
systemd=true
[interop]
enabled=true
appendWindowsPath=true
EOF
'@
# Restart WSL
Write-Host "Restarting WSL..." -ForegroundColor Yellow
wsl --shutdown
Start-Sleep -Seconds 3
# Install Node.js
Write-Host "Installing Node.js 22..." -ForegroundColor Yellow
wsl -u root -- bash -c "curl -fsSL https://deb.nodesource.com/setup_22.x | bash - && apt-get install -y nodejs"
# Configure passwordless sudo
Write-Host "Configuring sudo..." -ForegroundColor Yellow
wsl -u root -- bash -c "echo '$WslUser ALL=(ALL) NOPASSWD: ALL' > /etc/sudoers.d/$WslUser"
# Install OpenClaw
Write-Host "Installing OpenClaw..." -ForegroundColor Yellow
wsl -u $WslUser -- bash -c "sudo npm install -g openclaw"
# Verify
$version = wsl -u $WslUser -- openclaw --version
Write-Host "OpenClaw installed: $version" -ForegroundColor Green
Write-Host @"
=== Installation Complete ===
Next steps:
1. Open WSL terminal: wsl
2. Run onboarding: openclaw onboard --install-daemon
3. Follow the interactive setup wizard
"@ -ForegroundColor Cyan
```
### Create-OpenClawShortcuts.ps1
Creates desktop shortcuts for easy access:
- Run after OpenClaw onboarding is complete
```powershell
# Create-OpenClawShortcuts.ps1
param(
[string]$WslUser = ""
)
# Auto-detect or prompt for WSL username
if ([string]::IsNullOrEmpty($WslUser)) {
$WslUser = (wsl -- whoami 2>$null)
if ($LASTEXITCODE -ne 0 -or [string]::IsNullOrEmpty($WslUser)) {
$WslUser = Read-Host "Enter your WSL username"
}
$WslUser = $WslUser.Trim()
}
$Desktop = [Environment]::GetFolderPath("Desktop")
# Get token from OpenClaw config
$token = wsl -u $WslUser -- bash -c "grep -o '\"token\": \"[^\"]*\"' ~/.openclaw/openclaw.json | head -1 | cut -d'\"' -f4"
# Web UI shortcut
@"
[InternetShortcut]
URL=http://127.0.0.1:18789/?token=$token
"@ | Out-File "$Desktop\OpenClaw-WebUI.url" -Encoding ASCII
# TUI launcher
@"
@echo off
wsl -u $WslUser -- openclaw tui
"@ | Out-File "$Desktop\OpenClaw-TUI.bat" -Encoding ASCII
# Status checker
@"
@echo off
wsl -u $WslUser -- openclaw gateway status
pause
"@ | Out-File "$Desktop\OpenClaw-Status.bat" -Encoding ASCII
# Gateway restart
@"
@echo off
wsl -u $WslUser -- openclaw gateway restart
echo Gateway restarted.
pause
"@ | Out-File "$Desktop\OpenClaw-Restart.bat" -Encoding ASCII
Write-Host "Desktop shortcuts created!" -ForegroundColor Green
```
### Install-Chrome-WSL.ps1
If you want to use the built-in Browser Skill (or an MCP like PlayWright), you need to install Chrome first in WSL:
- Installs Google Chrome in WSL
- Required for browser automation MCPs (Playwright, Puppeteer)
```powershell
# Install-Chrome-WSL.ps1
param(
[string]$WslUser = ""
)
# Auto-detect or prompt for WSL username
if ([string]::IsNullOrEmpty($WslUser)) {
$WslUser = (wsl -- whoami 2>$null)
if ($LASTEXITCODE -ne 0 -or [string]::IsNullOrEmpty($WslUser)) {
$WslUser = Read-Host "Enter your WSL username"
}
$WslUser = $WslUser.Trim()
}
Write-Host "=== Installing Chrome in WSL ===" -ForegroundColor Cyan
Write-Host "Downloading Chrome..." -ForegroundColor Yellow
wsl -u $WslUser -- bash -c "cd /tmp && wget -q https://dl.google.com/linux/direct/google-chrome-stable_current_amd64.deb"
Write-Host "Installing Chrome..." -ForegroundColor Yellow
wsl -u $WslUser -- sudo dpkg -i /tmp/google-chrome-stable_current_amd64.deb 2>$null
wsl -u $WslUser -- sudo apt-get install -f -y
# Verify
$chromeVersion = wsl -u $WslUser -- google-chrome --version
Write-Host "`nChrome installed: $chromeVersion" -ForegroundColor Green
Write-Host @"
============================================
Chrome Installation Complete!
============================================
Test it by running in WSL:
google-chrome https://google.com
The browser window should appear on your Windows desktop (via WSLg).
"@ -ForegroundColor Cyan
pause
```
### Start-OpenClawGateway.ps1
Ensure gateway is running:
```powershell
# Start-OpenClawGateway.ps1
param(
[string]$WslUser = ""
)
# Auto-detect or prompt for WSL username
if ([string]::IsNullOrEmpty($WslUser)) {
$WslUser = (wsl -- whoami 2>$null)
if ($LASTEXITCODE -ne 0 -or [string]::IsNullOrEmpty($WslUser)) {
$WslUser = Read-Host "Enter your WSL username"
}
$WslUser = $WslUser.Trim()
}
# Check if WSL is running
$status = wsl -u $WslUser -- openclaw gateway status 2>&1
if ($status -match "running") {
Write-Host "OpenClaw gateway is already running." -ForegroundColor Green
} else {
Write-Host "Starting OpenClaw gateway..." -ForegroundColor Yellow
wsl -u $WslUser -- openclaw gateway start
Start-Sleep -Seconds 3
wsl -u $WslUser -- openclaw gateway status
}
```
### Reset-OpenClaw.ps1
Complete reset (WARNING: deletes all data):
```powershell
# Reset-OpenClaw.ps1
# WARNING: This deletes all OpenClaw data!
param(
[string]$WslUser = ""
)
# Auto-detect or prompt for WSL username
if ([string]::IsNullOrEmpty($WslUser)) {
$WslUser = (wsl -- whoami 2>$null)
if ($LASTEXITCODE -ne 0 -or [string]::IsNullOrEmpty($WslUser)) {
$WslUser = Read-Host "Enter your WSL username"
}
$WslUser = $WslUser.Trim()
}
$confirm = Read-Host "This will DELETE all OpenClaw data. Type 'yes' to confirm"
if ($confirm -ne "yes") {
Write-Host "Aborted." -ForegroundColor Yellow
exit
}
Write-Host "Stopping gateway..." -ForegroundColor Yellow
wsl -u $WslUser -- openclaw gateway stop 2>$null
Write-Host "Removing OpenClaw data..." -ForegroundColor Yellow
wsl -u $WslUser -- rm -rf ~/.openclaw
Write-Host "OpenClaw has been reset. Run 'openclaw onboard --install-daemon' to set up again." -ForegroundColor Green
```
---
## Configuration Files Reference
| File | Purpose |
|------|---------|
| `~/.openclaw/openclaw.json` | Main configuration (model, channels, tools, gateway) |
| `~/.openclaw/workspace/` | Agent workspace (memory, identity, skills) |
| `~/.openclaw/agents/` | Per-agent data and sessions |
| `~/.openclaw/.env` | Environment variables and API keys |
| `~/.openclaw/config/mcporter.json` | MCP server definitions |
| `/etc/wsl.conf` | WSL configuration (systemd, interop) |
| `~/.config/systemd/user/openclaw-gateway.service` | Gateway systemd service |
### Key Configuration Sections in openclaw.json
```json5
{
// AI Model
"agents": {
"defaults": {
"model": {
"primary": "github-copilot/gpt-4o"  // or "anthropic/claude-3-opus"
}
}
},
// Gateway
"gateway": {
"port": 18789,
"auth": {
"token": "your-secret-token"
}
},
// Channels
"channels": {
"whatsapp": { "enabled": true },
"discord": { "token": "bot-token" },
"telegram": { "botToken": "bot-token" }
},
// Tools permissions
"tools": {
"allow": ["*"]  // or specific tools
},
// Skills
"skills": {
"allowBundled": ["mcporter", "github"]
}
}
```
---
## Useful Commands
### Gateway Management
```bash
openclaw gateway status     # Check if running
openclaw gateway start      # Start gateway
openclaw gateway stop       # Stop gateway
openclaw gateway restart    # Restart gateway
openclaw gateway logs       # View logs
```
### Interacting with Your Bot
```bash
openclaw tui                # Terminal chat interface
openclaw dashboard          # Get Web UI link
openclaw chat "Hello"       # One-shot message
```
### Configuration
```bash
openclaw config             # Edit configuration
openclaw doctor             # Diagnose issues
openclaw security audit     # Security check
```
### Skills
```bash
openclaw skills list        # List available skills
openclaw skills info NAME   # Skill details
openclaw skills check       # Check requirements
```
### From Windows (PowerShell/CMD)
```powershell
wsl -u YOUR_WSL_USERNAME -- openclaw gateway status
wsl -u YOUR_WSL_USERNAME -- openclaw tui
wsl -u YOUR_WSL_USERNAME -- openclaw chat "Hello from Windows"
```
---
## Troubleshooting
### Gateway won't start
```bash
# Check logs
openclaw gateway logs
# Check if port is in use
ss -tlnp | grep 18789
# Restart systemd service
systemctl --user restart openclaw-gateway
```
### Systemd not working
```bash
# Verify systemd is PID 1
ps -p 1 -o comm=
# If not "systemd", check wsl.conf
cat /etc/wsl.conf
# Restart WSL from PowerShell
wsl --shutdown
```
### Node.js version too old
```bash
node --version  # Must be 22+
# Reinstall Node.js
curl -fsSL https://deb.nodesource.com/setup_22.x | sudo -E bash -
sudo apt-get install -y nodejs
```
### WhatsApp/Discord not connecting
```bash
# Re-run onboarding for channels
openclaw configure
# Check channel status
openclaw status
```
### WSL GUI apps not showing on Windows
In PowerShell (as Administrator):
```powershell
wsl --update
wsl --shutdown
```
Then verify WSLg works:
```bash
sudo apt install x11-apps -y
xclock  # Should show a clock window on Windows
```
### Permission denied errors
```bash
# Fix npm permissions
sudo chown -R $USER:$USER ~/.npm
sudo chown -R $USER:$USER ~/.openclaw
# Or reinstall OpenClaw
sudo npm uninstall -g openclaw
sudo npm install -g openclaw
```
### Complete reinstall
```bash
# Stop everything
openclaw gateway stop
# Remove all data
rm -rf ~/.openclaw
# Reinstall
sudo npm install -g openclaw
# Start fresh
openclaw onboard --install-daemon
```
### If scripts won't run due to execution policy
```powershell
Set-ExecutionPolicy RemoteSigned -Scope CurrentUser
```
If WSL commands fail:
```powershell
wsl --shutdown
```
(then try again)
To check on config issues in case the dashboard isnt loading or the gateway keeps saying "disconnected" immediately after restarting it:
OpenClaw uses systemd journal for logging (no separate log files on disk). The command to check logs is:
`journalctl --user -u openclaw-gateway -n 50`
**Useful variations:**
| Command | What it does |
|---------|--------------|
| `journalctl --user -u openclaw-gateway -n 100` | Last 100 lines |
| `journalctl --user -u openclaw-gateway -f` | Follow logs live (like tail -f) |
| `journalctl --user -u openclaw-gateway --since "5 min ago"` | Logs from last 5 minutes |
| `systemctl --user status openclaw-gateway` | Quick status + last few log lines |
There are no separate log files under ~/.openclaw/ — everything goes through systemd's journal.
---
## Quick Start Summary
```powershell
# 1. Install WSL (PowerShell as Admin)
wsl --install -d Ubuntu
# 2. After restart, open Ubuntu and run:
curl -fsSL https://deb.nodesource.com/setup_22.x | sudo -E bash -
sudo apt-get install -y nodejs
sudo npm install -g openclaw
openclaw onboard --install-daemon
# 3. Done! Access via:
# - WhatsApp (if configured)
# - Web UI: http://127.0.0.1:18789
# - Terminal: openclaw tui
```
---
OpenClaw is built by [Molty](https://molty.me/) 🦞, by [Peter Steinberger](https://steipete.me/) & [community](https://github.com/openclaw/openclaw#community) | [OpenClaw on Github](https://github.com/openclaw/openclaw) | [OpenClaw](https://openclaw.ai/)