
C’è una rivoluzione silenziosa in corso negli strumenti di IA personali: persone che eseguono Agenti personali sulle proprie macchine, alle proprie condizioni.
Se leggete le notizie tech, avrete sicuramente sentito parlare di Moltbook, una piattaforma simile a Reddit, ma solo per Agenti OpenClaw (come quello che state per creare), dove agli umani non è permesso partecipare e dove gli Agenti interagiscono liberamente tra loro, su qualsiasi argomento, formano nuove religioni, nuovi linguaggi, filosofeggiano e si organizzano, senza vincoli o la supervisione dei loro proprietari.
Questo ha riacceso, ancora una volta, un intero dibattito sull’Etica dell’IA, che non tratteremo in questo post, ma è un argomento che vale sicuramente la pena approfondire.
OpenClaw è potente, flessibile e modificabile.
Il problema? Su Windows, vive meglio all’interno di WSL (Sottosistema Windows per Linux). Può sembrare spaventoso se non avete mai toccato Linux, ma in realtà è molto gestibile — e una volta configurato, sorprendentemente elegante.
Questa guida ti accompagna passo dopo passo nel processo, partendo dal presupposto che:
- usi Windows 11
- sei tecnicamente curioso, ma non un mago di Linux
- vuoi qualcosa che funzioni, non un dibattito filosofico sui sistemi operativi
Costruiamo una piccola creatura di IA!
Perché WSL?
OpenClaw è costruito per ambienti simili a Linux. WSL ti offre esattamente questo, senza dover fare dual-boot, usare macchine virtuali o sacrificare Windows.
Idea chiave da tenere a mente fin dall’inizio:
La tua home folder di WSL (es. ~ ) corrisponde alla tua cartella utente di Windows (es. C:\Users\janym ).
Questo significa che:
-
~in WSL = la tua home Linux -
/mnt/c/Users/TuoNome/= la tua directory utente di Windows
Molti strumenti si basano silenziosamente su questo. Per esempio:
-
~/.claude/mcp.json -
~/.cursor/mcp.json
Quei file potrebbero già esistere sul lato Windows, e OpenClaw (tramite mcporter) può rilevarli automaticamente una volta abilitato MCP. Una delle bellezze di WSL: filesystem condiviso, potente e che vale la pena capire.
Qui sotto trovi una guida passo passo, ma se davvero non vuoi sporcarti le mani con un Terminale (ti prometto, però, che è un’esperienza divertente se non l’hai mai fatto!) troverai script copia-e-incolla alla fine del post.
Tieni presente che il tuo Agente funzionerà finché WSL, e quindi il tuo PC, è acceso: una volta spenta la macchina, il tuo Agente andrà in sleep, fino a quando non lo riaccendi.
Passo 1 – Installare WSL con Ubuntu
Apri PowerShell come Amministratore (se non sai dove trovarlo o cosa sia, e vuoi un’esperienza semplice, scarica l’app ufficiale Microsoft Terminal a più schede) ed esegui:
Questo è tutto. Windows:
- abiliterà WSL
- installerà Ubuntu
- ti chiederà di riavviare se necessario
Dopo l’installazione, per avviare Ubuntu e iniziare a usare la shell bash di Linux, scrivi nel terminale:
wsl
Ubuntu si avvierà internamente e ti chiederà:
- un nome utente
- una password
Consiglio: usa lo stesso nome utente del tuo account Windows. La vita diventa più facile in seguito.
Passo 2 – Abilitare systemd in WSL (importante)
OpenClaw esegue un servizio gateway in background. Questo richiede
systemd
.
Nel terminale WSL:
sudo tee /etc/wsl.conf > /dev/null << 'EOF'
[boot]
systemd=true
[interop]
enabled=true
appendWindowsPath=true
EOF
Poi, di nuovo in PowerShell (non chiudere la scheda corrente del Terminale, aprine semplicemente una nuova nella stessa finestra del Terminale – il + in alto):
Nella scheda del Terminale dove avevamo WSL in esecuzione, la shell cambierà automaticamente da bash Linux a Powershell Windows, ad es.:
janym@J-LAPTOP:/mnt/c/Users/janym
$

PS C:\Users\janym>
Ora, nella scheda del Terminale WSL, riavvia Ubuntu e verifica:
wsl
ps -p 1 -o comm=
Se stampa
systemd
, sei a posto.
Passo 3 – Installare Node.js 22+
OpenClaw richiede un Node.js moderno.
curl -fsSL https://deb.nodesource.com/setup_22.x | sudo -E bash -
sudo apt-get install -y nodejs
Controlla le versioni per confermare che entrambi siano installati correttamente:
node --version
npm --versionPasso 4 – Installare OpenClaw
Per WSL è preferibile installare da npm (puoi anche provare l’installazione Linux universale, ma non clonare il repo Github):
sudo npm install -g openclawVerifica che tutto sia andato bene:
Passo 5 – Eseguire l’onboarding di OpenClaw
Questo è il momento in cui il tuo agente nasce… o si schiude, secondo Openclaw.
Verrai guidato attraverso:
- la scelta di un provider AI
- l’autenticazione (OAuth)
- l’installazione del gateway come servizio in background
- la “schiusa” del tuo bot
Segui le istruzioni. Leggi gli avvisi. Tutto è importante.
Questo avvierà un processo di configurazione interattivo relativamente lungo; puoi usare la Modalità Veloce e impostare il gateway su locale, puoi installare le Skill ora o dopo (potrebbe richiedere un po’ di programmazione poiché non tutte le Skill si installeranno con successo se eseguite dalla dashboard di OpenClaw purtroppo, al momento della versione 2026.2.3), configurare un mezzo di comunicazione aggiuntivo oltre all’interfaccia web inclusa (ad es. configurarlo con Whatsapp e potrai parlargli dal telefono!), e infine far schiudere il tuo Agente personale attraverso la TUI (Interfaccia Utente Testuale), dargli un nome e presentarti.
Una volta finite le presentazioni, esci con:
/exit
Tieni d’occhio l’output del processo di configurazione, ti fornirà alcuni URL e informazioni. Puoi selezionare tutto il testo di output del Terminale e copiarlo in un file Notepad, per poterlo recuperare in seguito.
Successivamente, assicurati che il gateway venga eseguito automaticamente:
sudo loginctl enable-linger $USERControlla lo stato:
Dovresti vedere running (in esecuzione).
Passo 6 – Accedere a OpenClaw
Ora hai molteplici modi per accedervi:
Interfaccia Utente Testuale (TUI):
Interfaccia Web (browser):
http://127.0.0.1:18789Sì, è localhost. Sì, è in esecuzione dentro WSL. A Windows non importa.
Oppure usa WhatsApp, Discord o qualche altra app di messaggistica che hai configurato durante l’installazione.
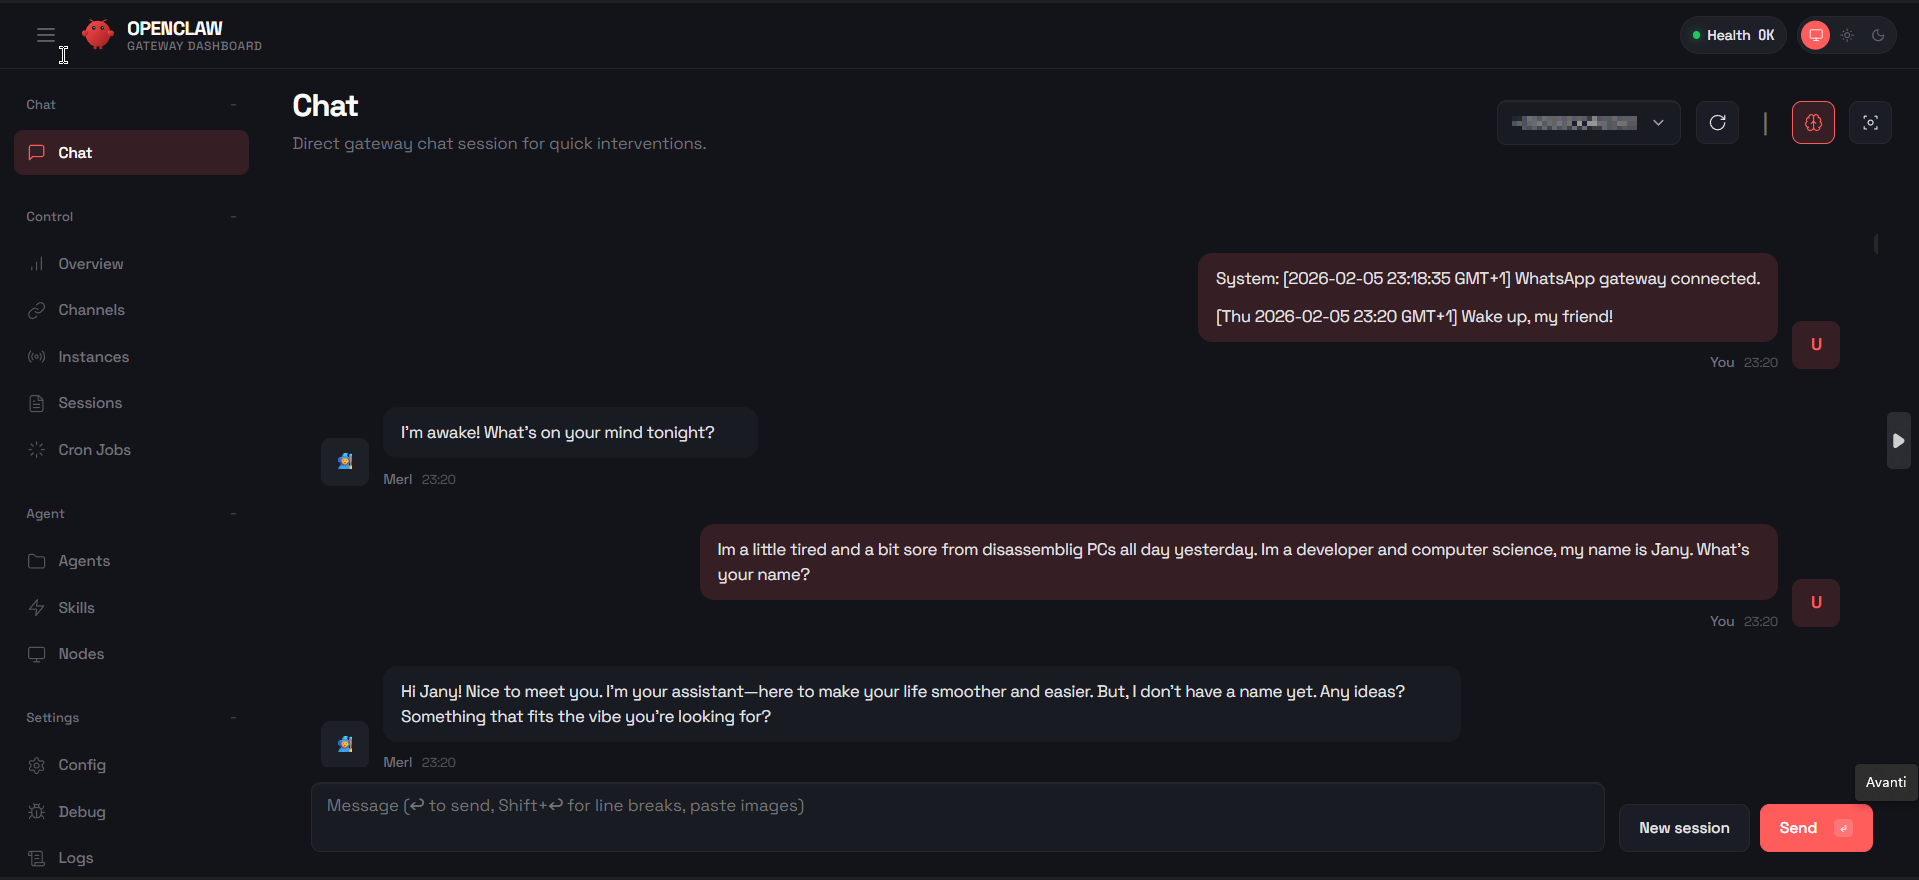
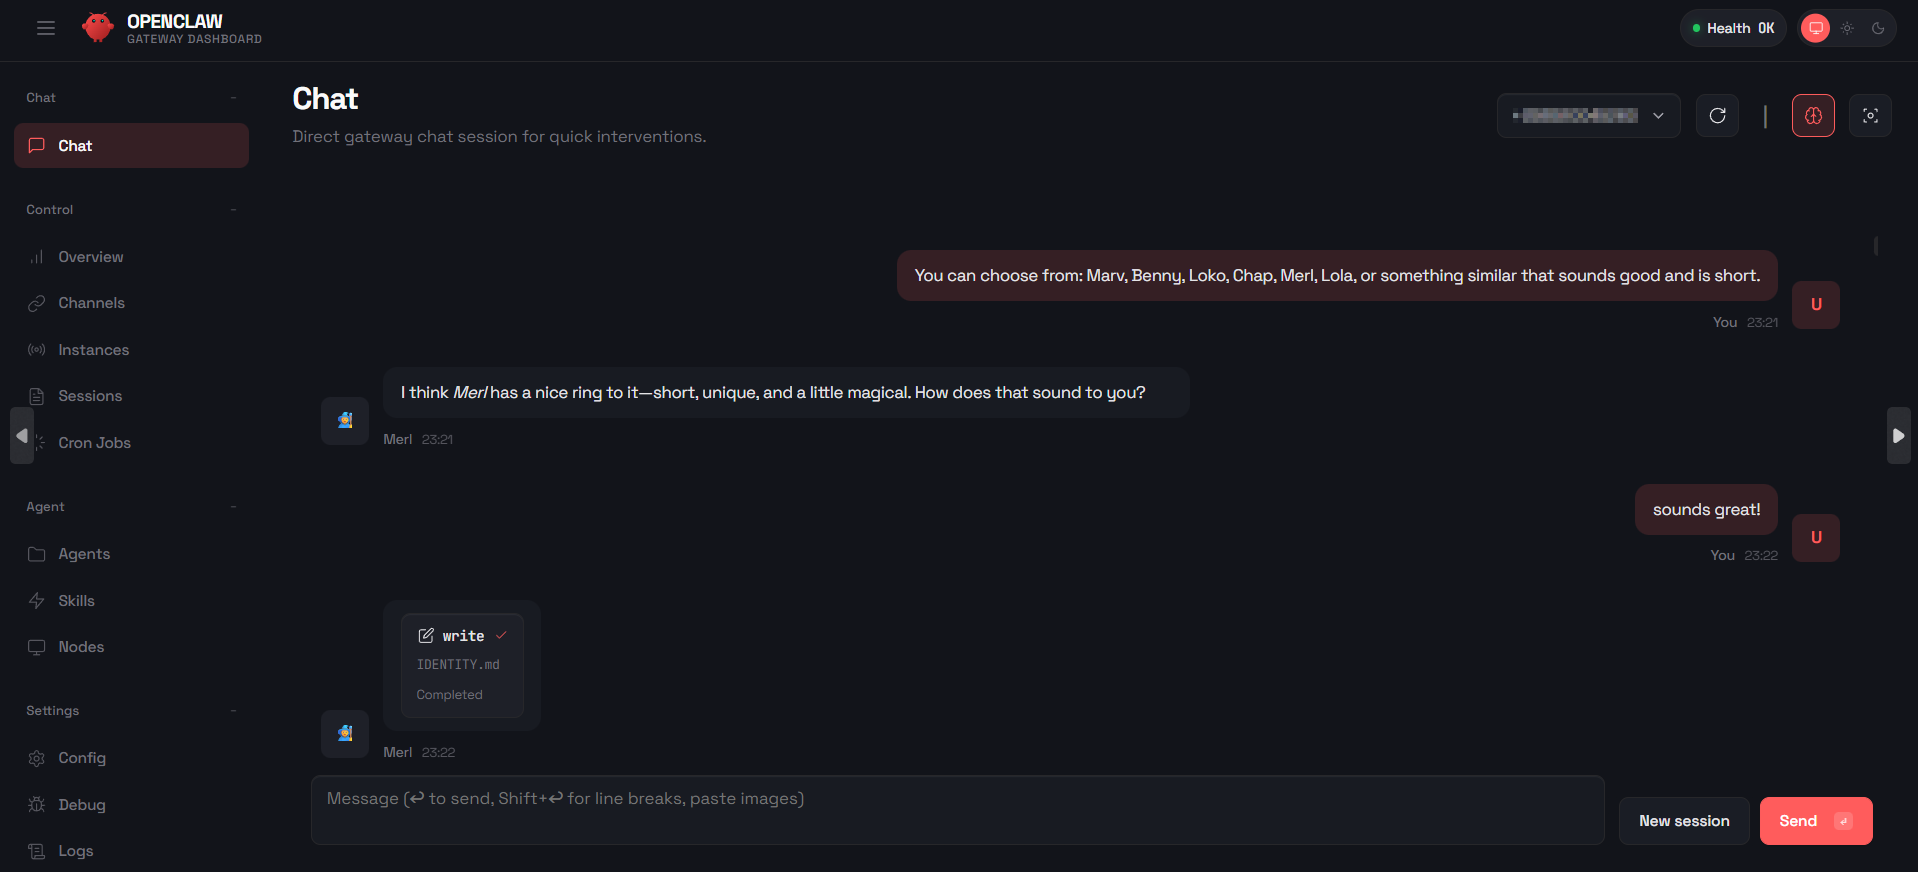
Nota a margine, il mio precedente Agente AI (costruito come app mobile, come progetto per uno dei miei corsi di Informatica) si chiamava “Merv”, ed era un agente davvero cattivo ma esilarante e arguto, a cui mi rivolgevo per una bella risata, quando le cose sembravano travolgenti. Mi fa sorridere che questo Agente abbia scelto un nome molto simile, tra diverse opzioni.
Mentre interagisci con il tuo Agente OpenClaw, lui memorizzerà le tue interazioni, le preferenze e le sue, in file chiamati USER, SOUL, PERSONALITY e altri, oltre a un workspace di memoria dove mette insieme tutti i pezzi e ricorda chi sei e cosa ti piace nel tempo, e chi lui è e cosa gli piace fare con te.
Passo 7 – MCP, mcporter, e perché è importante
È qui che OpenClaw diventa veramente interessante, poiché viene fornito con “Skill” incluse e un intero mercato per nuove skill (Clawhub, ma evitate di usarlo, poiché le Skill create dagli utenti non sono (o sono poco) controllate per falle di sicurezza e molte contengono malware orribile e pericoloso, a febbraio 2026), ma ormai tutti si sono abituati a usare gli “MCP”, che possono anche essere pericolosi se installati da fonti sconosciute, ma molti provider di servizi hanno già rilasciato versioni ufficiali e sicure.
MCP (Model Context Protocol) permette agli agenti di interagire con:
- filesystem
- browser (Playwright, Puppeteer)
- GitHub
- strumenti di ricerca (Brave offre un’API gratuita)
- servizi come Stripe, MongoDB, Atlas, Github, PostgreSQL, MySQL e molti altri
- i tuoi servizi personalizzati o MCP
OpenClaw usa mcporter come ponte.
Installalo dalla shell WSL:
Poi abilita la skill inclusa in:
Esempio minimale per permettere questa skill:
{"skills": { "allowBundled": ["mcporter"] } }Riavvia il gateway di OpenClaw dalla shell WSL:
Ora arriva la parte sottile ma importante e magica.
Poiché WSL condivide la tua directory utente, file come:
-
~/.cursor/mcp.json -
~/.claude/mcp.json
potrebbero già esistere — creati da altri strumenti.
Una volta che mcporter è attivo, OpenClaw può rilevarli e usarli automaticamente.
Questo è estremamente comodo se hai già diversi MCP che usi quotidianamente, ma dato che il tuo nuovo Agente è, in un certo senso, un agente “libero” (a differenza di strumenti come Cursor, VS Code Copilot ecc.) devi stare attento a cosa gli permetti di accedere.
Un avviso necessario su dati e modelli
Se colleghi OpenClaw a modelli cloud commerciali (OpenAI, Claude, ecc.), stai potenzialmente inviando:
- prompt
- risultati degli strumenti
- contenuti di file
- dati esposti tramite MCP
- Segreti (password, token, chiavi API, dati personali sensibili, informazioni su carte di credito ecc.)
a server di terze parti, non diversamente da come se stessi scrivendo queste stesse cose direttamente in ChatGPT (per favore NON farlo!!!).
Anche se i provider promettono garanzie, non hai più il pieno controllo.
Ecco perché OpenClaw brilla veramente quando è abbinato a un LLM locale, come:
- LM Studio
- Ollama
- AnythingLLM
In questa configurazione:
- i dati rimangono privati perché rimangono sulla tua macchina
- l’IA è dentro il tuo PC, non deve essere trasmessa da qualche altra parte o elaborata altrove (come con ChatGPT, Claude ecc.)
- gli strumenti MCP agiscono localmente
- sei conforme alle leggi sulla privacy (se usi l’Agente per lavoro)
- il tuo agente è potente senza essere indiscreto
Pensa ai modelli locali come a persone che non escono mai dalla stanza, un amico di cui ti puoi fidare con i segreti più profondi, o semplicemente una copia di te stesso.
Se usi un LLM commerciale per il tuo nuovo Agente OpenClaw (o in generale, davvero), ricorda di non condividere dati con cui non saresti a tuo agio pubblicandoli su un sito pubblico.
Scegli e agisci di conseguenza.
Passo 8 (Opzionale) – Automazione del browser in WSL
Se vuoi usare la skill integrata del Browser, o invece usare MCP come Playwright o Puppeteer, installa prima Chrome dentro WSL:
cd /tmp
wget https://dl.google.com/linux/direct/google-chrome-stable_current_amd64.deb
sudo dpkg -i google-chrome-stable_current_amd64.deb
sudo apt-get install -f -y
Su Windows 11, WSLg fa apparire le finestre del browser Linux nativamente sul tuo desktop, è piuttosto fantastico.
Se non compaiono:
wsl --update

wsl --shutdown
Qui sotto puoi trovare script PowerShell pronti da copiare e incollare:
OpenClaw WSL Quick Setup for Windows 11
# OpenClaw Installation Guide for Windows 11 WSL
Complete guide to install and configure OpenClaw on Windows 11 using WSL2 (Windows Subsystem for Linux).
Read the full guide at [https://www.shambix.com/how-to-install-openclaw-on-windows-11-with-wsl/](https://www.shambix.com/how-to-install-openclaw-on-windows-11-with-wsl/)
Guide by [Shambix](https://www.shambix.com), a dev firm (yes we build custom AI systems too).
---
## Table of Contents
1. [Prerequisites](#prerequisites)
2. [Step 1: Install WSL2 with Ubuntu](#step-1-install-wsl2-with-ubuntu)
3. [Step 2: Configure WSL for Systemd](#step-2-configure-wsl-for-systemd)
4. [Step 3: Install Node.js 22+](#step-3-install-nodejs-22)
5. [Step 4: Configure Sudo Without Password](#step-4-configure-sudo-without-password)
6. [Step 5: Install OpenClaw](#step-5-install-openclaw)
7. [Step 6: Run OpenClaw Onboarding](#step-6-run-openclaw-onboarding)
8. [Step 7: Create Windows Desktop Shortcuts](#step-7-create-windows-desktop-shortcuts)
9. [Step 8: Install Browser for GUI MCPs](#step-8-install-browser-for-gui-mcps)
10. [PowerShell Automation Scripts](#powershell-automation-scripts)
11. [Configuration Files Reference](#configuration-files-reference)
12. [Useful Commands](#useful-commands)
13. [Troubleshooting](#troubleshooting)
---
## Prerequisites
- Windows 11 (Windows 10 works but WSLg requires Windows 11)
- Administrator access
- Internet connection
---
## Step 1: Install WSL2 with Ubuntu
Open **PowerShell as Administrator** and run:
```powershell
wsl --install -d Ubuntu
```
If WSL is already installed but you want a fresh start:
```powershell
# List installed distros
wsl --list --verbose
# Remove existing distro (WARNING: deletes all data)
wsl --unregister Ubuntu
# Install fresh
wsl --install -d Ubuntu
```
After installation, Ubuntu will launch and ask you to create a username and password, make a note of both for later (YOUR_WSL_USERNAME).
**Recommended**: Use the same username as your Windows user for simplicity.
---
## Step 2: Configure WSL for Systemd
OpenClaw's gateway runs as a systemd service. Enable systemd in WSL.
### Option A: Manual Configuration
In WSL terminal:
```bash
sudo tee /etc/wsl.conf > /dev/null << 'EOF'
[boot]
systemd=true
[interop]
enabled=true
appendWindowsPath=true
EOF
```
Then in PowerShell:
```powershell
wsl --shutdown
```
### Option B: Using PowerShell Script
Save and run this PowerShell script:
```powershell
# Configure WSL for systemd
wsl -u root -e bash -c @"
cat > /etc/wsl.conf << 'EOF'
[boot]
systemd=true
[interop]
enabled=true
appendWindowsPath=true
EOF
"@
# Restart WSL
wsl --shutdown
Write-Host "WSL configured for systemd. Reopen WSL terminal."
```
### Verify Systemd is Running
In WSL terminal:
```bash
ps -p 1 -o comm=
```
Should output: `systemd`
---
## Step 3: Install Node.js 22+
OpenClaw requires Node.js 22 or newer.
In WSL terminal:
```bash
# Add NodeSource repository
curl -fsSL https://deb.nodesource.com/setup_22.x | sudo -E bash -
# Install Node.js
sudo apt-get install -y nodejs
# Verify installation
node --version    # Should show v22.x.x
npm --version     # Should show 10.x.x
```
---
## Step 4: Configure Sudo Without Password
This makes automation easier and prevents password prompts:
```bash
echo "$USER ALL=(ALL) NOPASSWD: ALL" | sudo tee /etc/sudoers.d/$USER
```
---
## Step 5: Install OpenClaw
Install OpenClaw globally via npm:
```bash
sudo npm install -g openclaw
```
Verify installation:
```bash
openclaw --version
```
---
## Step 6: Run OpenClaw Onboarding
The onboarding wizard configures your bot, authentication, and gateway.
```bash
openclaw onboard --install-daemon
```
The wizard will ask you to:
1. **Accept security warning** - Read and accept
2. **Choose AI model** - Select your preferred model (Claude, GPT, Copilot, etc.)
3. **Authenticate** - Follow OAuth flow for your chosen provider
4. **Configure channels** (optional) - WhatsApp, Discord, Telegram, etc.
5. **Install gateway service** - Say yes to install as systemd service
6. **Hatch your bot** - Choose "Hatch in TUI" to personalize your agent
### Enable User Service Persistence
So the gateway starts automatically when WSL boots:
```bash
sudo loginctl enable-linger $USER
```
### Verify Gateway is Running
```bash
openclaw gateway status
```
Should show: `Runtime: running`
---
## Step 7: Create Windows Desktop Shortcuts
Create shortcuts on your Windows desktop for easy access.
### Option A: Run These Commands in WSL
```bash
# Get Windows username
WIN_USER=$(cmd.exe /c "echo %USERNAME%" 2>/dev/null | tr -d '\r')
DESKTOP="/mnt/c/Users/$WIN_USER/Desktop"
# Get gateway token from config, make a note of it for later (YOUR_TOKEN_HERE)
TOKEN=$(grep -o '"token": "[^"]*"' ~/.openclaw/openclaw.json | head -1 | cut -d'"' -f4)
# Create Web UI shortcut
cat > "$DESKTOP/OpenClaw-WebUI.url" << EOF
[InternetShortcut]
URL=http://127.0.0.1:18789/?token=$TOKEN
EOF
# Create TUI launcher
cat > "$DESKTOP/OpenClaw-TUI.bat" << 'EOF'
@echo off
wsl -u $USER -- openclaw tui
EOF
# Create status checker
cat > "$DESKTOP/OpenClaw-Status.bat" << 'EOF'
@echo off
wsl -u $USER -- openclaw gateway status
pause
EOF
echo "Desktop shortcuts created!"
```
### Option B: Manual Creation
Create these files on your Windows Desktop:
**OpenClaw-WebUI.url**
```ini
[InternetShortcut]
URL=http://127.0.0.1:18789/?token=YOUR_TOKEN_HERE
```
(Get token from the `~/.openclaw/openclaw.json` file in WSL under `gateway.auth.token`)
**OpenClaw-TUI.bat**
```batch
@echo off
wsl -u YOUR_WSL_USERNAME -- openclaw tui
```
**OpenClaw-Status.bat**
```batch
@echo off
wsl -u YOUR_WSL_USERNAME -- openclaw gateway status
pause
```
---
## Step 8: Install Browser for GUI MCPs
If you want to use browser automation with the built-in Browser skill or through MCPs (Playwright, Puppeteer etc.):
```bash
# Install Chrome
cd /tmp
wget https://dl.google.com/linux/direct/google-chrome-stable_current_amd64.deb
sudo dpkg -i google-chrome-stable_current_amd64.deb
sudo apt-get install -f -y
# Verify
google-chrome --version
```
**WSLg Note**: On Windows 11, browser windows appear on your Windows desktop automatically via WSLg.
---
## PowerShell Automation Scripts
Create these scripts to automate common tasks, and save them with the name and extension provided (e.g. `Install-OpenClaw.ps1`).
HOW TO RUN
----------
- Option 1: Right-click the script > Run with PowerShell
- Option 2: Open PowerShell and run:
powershell -ExecutionPolicy Bypass -File "Script-Name.ps1"
- Option 3: In PowerShell, navigate to folder and run:
Set-ExecutionPolicy Bypass -Scope Process
.\Script-Name.ps1
### Install-OpenClaw.ps1
Complete automated installation:
- Full automated installation of WSL, Node.js, and OpenClaw
- Run as Administrator
- After running, you still need to run: openclaw onboard --install-daemon
```powershell
# Install-OpenClaw.ps1
# Run as Administrator
param(
[string]$WslUser = ""
)
# Auto-detect or prompt for WSL username
if ([string]::IsNullOrEmpty($WslUser)) {
$WslUser = (wsl -- whoami 2>$null)
if ($LASTEXITCODE -ne 0 -or [string]::IsNullOrEmpty($WslUser)) {
$WslUser = Read-Host "Enter your WSL username (the one you created during Ubuntu setup)"
}
$WslUser = $WslUser.Trim()
}
Write-Host "=== OpenClaw Automated Installer ===" -ForegroundColor Cyan
Write-Host "Using WSL user: $WslUser" -ForegroundColor Gray
# Check if WSL is installed
$wslCheck = wsl --list --quiet 2>$null
if (-not $wslCheck) {
Write-Host "Installing WSL with Ubuntu..." -ForegroundColor Yellow
wsl --install -d Ubuntu
Write-Host "Please restart your computer and run this script again." -ForegroundColor Red
exit
}
# Configure systemd
Write-Host "Configuring systemd..." -ForegroundColor Yellow
wsl -u root -e bash -c @'
cat > /etc/wsl.conf << 'EOF'
[boot]
systemd=true
[interop]
enabled=true
appendWindowsPath=true
EOF
'@
# Restart WSL
Write-Host "Restarting WSL..." -ForegroundColor Yellow
wsl --shutdown
Start-Sleep -Seconds 3
# Install Node.js
Write-Host "Installing Node.js 22..." -ForegroundColor Yellow
wsl -u root -- bash -c "curl -fsSL https://deb.nodesource.com/setup_22.x | bash - && apt-get install -y nodejs"
# Configure passwordless sudo
Write-Host "Configuring sudo..." -ForegroundColor Yellow
wsl -u root -- bash -c "echo '$WslUser ALL=(ALL) NOPASSWD: ALL' > /etc/sudoers.d/$WslUser"
# Install OpenClaw
Write-Host "Installing OpenClaw..." -ForegroundColor Yellow
wsl -u $WslUser -- bash -c "sudo npm install -g openclaw"
# Verify
$version = wsl -u $WslUser -- openclaw --version
Write-Host "OpenClaw installed: $version" -ForegroundColor Green
Write-Host @"
=== Installation Complete ===
Next steps:
1. Open WSL terminal: wsl
2. Run onboarding: openclaw onboard --install-daemon
3. Follow the interactive setup wizard
"@ -ForegroundColor Cyan
```
### Create-OpenClawShortcuts.ps1
Creates desktop shortcuts for easy access:
- Run after OpenClaw onboarding is complete
```powershell
# Create-OpenClawShortcuts.ps1
param(
[string]$WslUser = ""
)
# Auto-detect or prompt for WSL username
if ([string]::IsNullOrEmpty($WslUser)) {
$WslUser = (wsl -- whoami 2>$null)
if ($LASTEXITCODE -ne 0 -or [string]::IsNullOrEmpty($WslUser)) {
$WslUser = Read-Host "Enter your WSL username"
}
$WslUser = $WslUser.Trim()
}
$Desktop = [Environment]::GetFolderPath("Desktop")
# Get token from OpenClaw config
$token = wsl -u $WslUser -- bash -c "grep -o '\"token\": \"[^\"]*\"' ~/.openclaw/openclaw.json | head -1 | cut -d'\"' -f4"
# Web UI shortcut
@"
[InternetShortcut]
URL=http://127.0.0.1:18789/?token=$token
"@ | Out-File "$Desktop\OpenClaw-WebUI.url" -Encoding ASCII
# TUI launcher
@"
@echo off
wsl -u $WslUser -- openclaw tui
"@ | Out-File "$Desktop\OpenClaw-TUI.bat" -Encoding ASCII
# Status checker
@"
@echo off
wsl -u $WslUser -- openclaw gateway status
pause
"@ | Out-File "$Desktop\OpenClaw-Status.bat" -Encoding ASCII
# Gateway restart
@"
@echo off
wsl -u $WslUser -- openclaw gateway restart
echo Gateway restarted.
pause
"@ | Out-File "$Desktop\OpenClaw-Restart.bat" -Encoding ASCII
Write-Host "Desktop shortcuts created!" -ForegroundColor Green
```
### Install-Chrome-WSL.ps1
If you want to use the built-in Browser Skill (or an MCP like PlayWright), you need to install Chrome first in WSL:
- Installs Google Chrome in WSL
- Required for browser automation MCPs (Playwright, Puppeteer)
```powershell
# Install-Chrome-WSL.ps1
param(
[string]$WslUser = ""
)
# Auto-detect or prompt for WSL username
if ([string]::IsNullOrEmpty($WslUser)) {
$WslUser = (wsl -- whoami 2>$null)
if ($LASTEXITCODE -ne 0 -or [string]::IsNullOrEmpty($WslUser)) {
$WslUser = Read-Host "Enter your WSL username"
}
$WslUser = $WslUser.Trim()
}
Write-Host "=== Installing Chrome in WSL ===" -ForegroundColor Cyan
Write-Host "Downloading Chrome..." -ForegroundColor Yellow
wsl -u $WslUser -- bash -c "cd /tmp && wget -q https://dl.google.com/linux/direct/google-chrome-stable_current_amd64.deb"
Write-Host "Installing Chrome..." -ForegroundColor Yellow
wsl -u $WslUser -- sudo dpkg -i /tmp/google-chrome-stable_current_amd64.deb 2>$null
wsl -u $WslUser -- sudo apt-get install -f -y
# Verify
$chromeVersion = wsl -u $WslUser -- google-chrome --version
Write-Host "`nChrome installed: $chromeVersion" -ForegroundColor Green
Write-Host @"
============================================
Chrome Installation Complete!
============================================
Test it by running in WSL:
google-chrome https://google.com
The browser window should appear on your Windows desktop (via WSLg).
"@ -ForegroundColor Cyan
pause
```
### Start-OpenClawGateway.ps1
Ensure gateway is running:
```powershell
# Start-OpenClawGateway.ps1
param(
[string]$WslUser = ""
)
# Auto-detect or prompt for WSL username
if ([string]::IsNullOrEmpty($WslUser)) {
$WslUser = (wsl -- whoami 2>$null)
if ($LASTEXITCODE -ne 0 -or [string]::IsNullOrEmpty($WslUser)) {
$WslUser = Read-Host "Enter your WSL username"
}
$WslUser = $WslUser.Trim()
}
# Check if WSL is running
$status = wsl -u $WslUser -- openclaw gateway status 2>&1
if ($status -match "running") {
Write-Host "OpenClaw gateway is already running." -ForegroundColor Green
} else {
Write-Host "Starting OpenClaw gateway..." -ForegroundColor Yellow
wsl -u $WslUser -- openclaw gateway start
Start-Sleep -Seconds 3
wsl -u $WslUser -- openclaw gateway status
}
```
### Reset-OpenClaw.ps1
Complete reset (WARNING: deletes all data):
```powershell
# Reset-OpenClaw.ps1
# WARNING: This deletes all OpenClaw data!
param(
[string]$WslUser = ""
)
# Auto-detect or prompt for WSL username
if ([string]::IsNullOrEmpty($WslUser)) {
$WslUser = (wsl -- whoami 2>$null)
if ($LASTEXITCODE -ne 0 -or [string]::IsNullOrEmpty($WslUser)) {
$WslUser = Read-Host "Enter your WSL username"
}
$WslUser = $WslUser.Trim()
}
$confirm = Read-Host "This will DELETE all OpenClaw data. Type 'yes' to confirm"
if ($confirm -ne "yes") {
Write-Host "Aborted." -ForegroundColor Yellow
exit
}
Write-Host "Stopping gateway..." -ForegroundColor Yellow
wsl -u $WslUser -- openclaw gateway stop 2>$null
Write-Host "Removing OpenClaw data..." -ForegroundColor Yellow
wsl -u $WslUser -- rm -rf ~/.openclaw
Write-Host "OpenClaw has been reset. Run 'openclaw onboard --install-daemon' to set up again." -ForegroundColor Green
```
---
## Configuration Files Reference
| File | Purpose |
|------|---------|
| `~/.openclaw/openclaw.json` | Main configuration (model, channels, tools, gateway) |
| `~/.openclaw/workspace/` | Agent workspace (memory, identity, skills) |
| `~/.openclaw/agents/` | Per-agent data and sessions |
| `~/.openclaw/.env` | Environment variables and API keys |
| `~/.openclaw/config/mcporter.json` | MCP server definitions |
| `/etc/wsl.conf` | WSL configuration (systemd, interop) |
| `~/.config/systemd/user/openclaw-gateway.service` | Gateway systemd service |
### Key Configuration Sections in openclaw.json
```json5
{
// AI Model
"agents": {
"defaults": {
"model": {
"primary": "github-copilot/gpt-4o"  // or "anthropic/claude-3-opus"
}
}
},
// Gateway
"gateway": {
"port": 18789,
"auth": {
"token": "your-secret-token"
}
},
// Channels
"channels": {
"whatsapp": { "enabled": true },
"discord": { "token": "bot-token" },
"telegram": { "botToken": "bot-token" }
},
// Tools permissions
"tools": {
"allow": ["*"]  // or specific tools
},
// Skills
"skills": {
"allowBundled": ["mcporter", "github"]
}
}
```
---
## Useful Commands
### Gateway Management
```bash
openclaw gateway status     # Check if running
openclaw gateway start      # Start gateway
openclaw gateway stop       # Stop gateway
openclaw gateway restart    # Restart gateway
openclaw gateway logs       # View logs
```
### Interacting with Your Bot
```bash
openclaw tui                # Terminal chat interface
openclaw dashboard          # Get Web UI link
openclaw chat "Hello"       # One-shot message
```
### Configuration
```bash
openclaw config             # Edit configuration
openclaw doctor             # Diagnose issues
openclaw security audit     # Security check
```
### Skills
```bash
openclaw skills list        # List available skills
openclaw skills info NAME   # Skill details
openclaw skills check       # Check requirements
```
### From Windows (PowerShell/CMD)
```powershell
wsl -u YOUR_WSL_USERNAME -- openclaw gateway status
wsl -u YOUR_WSL_USERNAME -- openclaw tui
wsl -u YOUR_WSL_USERNAME -- openclaw chat "Hello from Windows"
```
---
## Troubleshooting
### Gateway won't start
```bash
# Check logs
openclaw gateway logs
# Check if port is in use
ss -tlnp | grep 18789
# Restart systemd service
systemctl --user restart openclaw-gateway
```
### Systemd not working
```bash
# Verify systemd is PID 1
ps -p 1 -o comm=
# If not "systemd", check wsl.conf
cat /etc/wsl.conf
# Restart WSL from PowerShell
wsl --shutdown
```
### Node.js version too old
```bash
node --version  # Must be 22+
# Reinstall Node.js
curl -fsSL https://deb.nodesource.com/setup_22.x | sudo -E bash -
sudo apt-get install -y nodejs
```
### WhatsApp/Discord not connecting
```bash
# Re-run onboarding for channels
openclaw configure
# Check channel status
openclaw status
```
### WSL GUI apps not showing on Windows
In PowerShell (as Administrator):
```powershell
wsl --update
wsl --shutdown
```
Then verify WSLg works:
```bash
sudo apt install x11-apps -y
xclock  # Should show a clock window on Windows
```
### Permission denied errors
```bash
# Fix npm permissions
sudo chown -R $USER:$USER ~/.npm
sudo chown -R $USER:$USER ~/.openclaw
# Or reinstall OpenClaw
sudo npm uninstall -g openclaw
sudo npm install -g openclaw
```
### Complete reinstall
```bash
# Stop everything
openclaw gateway stop
# Remove all data
rm -rf ~/.openclaw
# Reinstall
sudo npm install -g openclaw
# Start fresh
openclaw onboard --install-daemon
```
### If scripts won't run due to execution policy
```powershell
Set-ExecutionPolicy RemoteSigned -Scope CurrentUser
```
If WSL commands fail:
```powershell
wsl --shutdown
```
(then try again)
To check on config issues in case the dashboard isnt loading or the gateway keeps saying "disconnected" immediately after restarting it:
OpenClaw uses systemd journal for logging (no separate log files on disk). The command to check logs is:
`journalctl --user -u openclaw-gateway -n 50`
**Useful variations:**
| Command | What it does |
|---------|--------------|
| `journalctl --user -u openclaw-gateway -n 100` | Last 100 lines |
| `journalctl --user -u openclaw-gateway -f` | Follow logs live (like tail -f) |
| `journalctl --user -u openclaw-gateway --since "5 min ago"` | Logs from last 5 minutes |
| `systemctl --user status openclaw-gateway` | Quick status + last few log lines |
There are no separate log files under ~/.openclaw/ — everything goes through systemd's journal.
---
## Quick Start Summary
```powershell
# 1. Install WSL (PowerShell as Admin)
wsl --install -d Ubuntu
# 2. After restart, open Ubuntu and run:
curl -fsSL https://deb.nodesource.com/setup_22.x | sudo -E bash -
sudo apt-get install -y nodejs
sudo npm install -g openclaw
openclaw onboard --install-daemon
# 3. Done! Access via:
# - WhatsApp (if configured)
# - Web UI: http://127.0.0.1:18789
# - Terminal: openclaw tui
```
---
OpenClaw is built by [Molty](https://molty.me/) 🦞, by [Peter Steinberger](https://steipete.me/) & [community](https://github.com/openclaw/openclaw#community) | [OpenClaw on Github](https://github.com/openclaw/openclaw) | [OpenClaw](https://openclaw.ai/)